eduVPN protects you on unsecure networks, for example, against nearby prying eyes while on the train. The service also offers secure access to protected services when accessing from outside your institution's network.
Getting started with eduVPN
On this page, you will find all the software and you can read exactly what you need to do in order to use eduVPN.
You can configure eduVPN for two different use cases: to use internet safely on public networks and to get access to your institution’s shielded services and applications, like grading software. Below, we only explain how you configure your device for the first situation. Do you want to use eduVPN for the second situation? Follow the instructions you got from your institution or contact the IT-helpdesk.
2. Creating an account

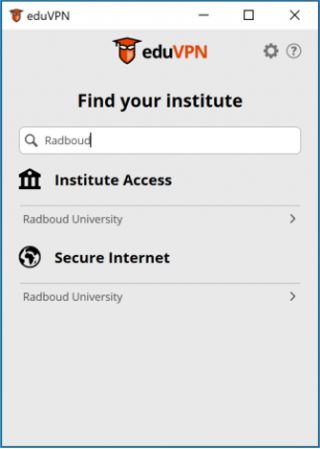
When you first open the program or app, you search for your own institution name. In the image below, the search was for 'Radboud'. It is then shown that for Radboud University, two functions are available:
- Institute Access, to securely connect to the institution's network to access protected applications.
- Secure Internet, for safe browsing on public networks
Choose the function for which you want to use eduVPN. You will automatically be transferred to your browser and log in with the details that you have received from your organisation (your institution account) and that you also use to log in to other services. Usually they have the form 'yourname@yourinstitutionsname.nl'.
3. Giving permission
After logging in to your own organisation, you will be taken to the web page below. Click Toestaan so that a secret private key is transferred to the eduVPN client that is on your computer.

4. Starting VPN connection

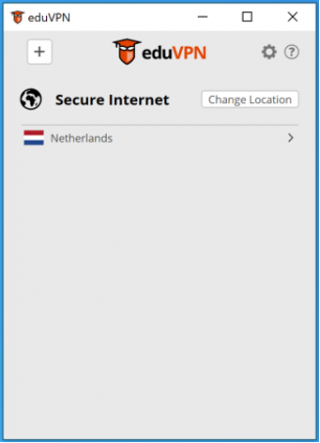
Once the key is in the eduVPN client, you can start the VPN connection. In the example below, Secure Internet is available and you can connect to the Dutch secure internet server. After you click on Netherlands, the VPN connection is started.
5. VPN-connection active

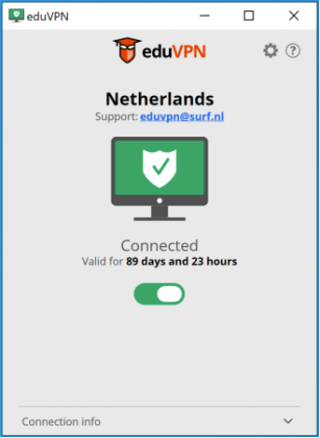
The green icon shows that the VPN is active. It also shows how long you can use the VPN before you have to log in again (via your own institution). For security reasons, institutions actually choose to limit the running time of the VPN.
Other platforms
We are currently not developing specific software for other platforms, but you can usually also use eduVPN on such platforms. Download the available OpenVPN client and install it.
There are two eduVPN versions: Securely surfing the Internet (Secure Internet) & access to the institute network (Institute Access).
- For Secure Internet, you need to surf to https://nl.eduvpn.org/ and log in using your institution account.
- For Institute Access, you need to surf to a web address, such as http://<yourinstitution>.eduvpn.nl. Contact your helpdesk for the exact address.
Generate a configuration file via the eduVPN portal. This will enable you to start a connection in OpenVPN.
Please note that the configuration file expires and openVPN does not show this clearly, with the result that openVPN refuses to connect. In some organisations this configuration even expires within one day, so that a new configuration file has to be created and installed every day.

